In this document we present the steps that can help you generate and download a full backup from cPanel account.
This operation will include in the backup all files from your account, databases, email accounts and their settings.
We recommend you generating such backup's when you make major changes on your site or you want to migrate to another server.

Generate backup


The cPanel theme doesn't matter as the step's you need to follow are the same:
1. Log in into your cPanel account

2.Go to 'Files' and select 'Backup'
3. In the next page click on 'Download a Full Website Backup' option.


4. In this step we will select the location where the backup will be saved and we can chose to be notified by email when the backup is finished.
The default location where the backup is saved is /home .


5. When backup starts, in the next page you will see the message from the image below and when the backup is finished  you will receive a notification
on the entered email address.


6. When the backup is finished you can dowload it by going to:

a. Files >> Backup >> Backups Available for Download


b. File Manager >> Home >> Select the backup file then, Download.
Restore Backup
Note that "Full Backup" can not be restored from the cPanel interface if the hosting account is on a shared server or a reseller account.
In this case you must contact the support team to help you with the restoration.
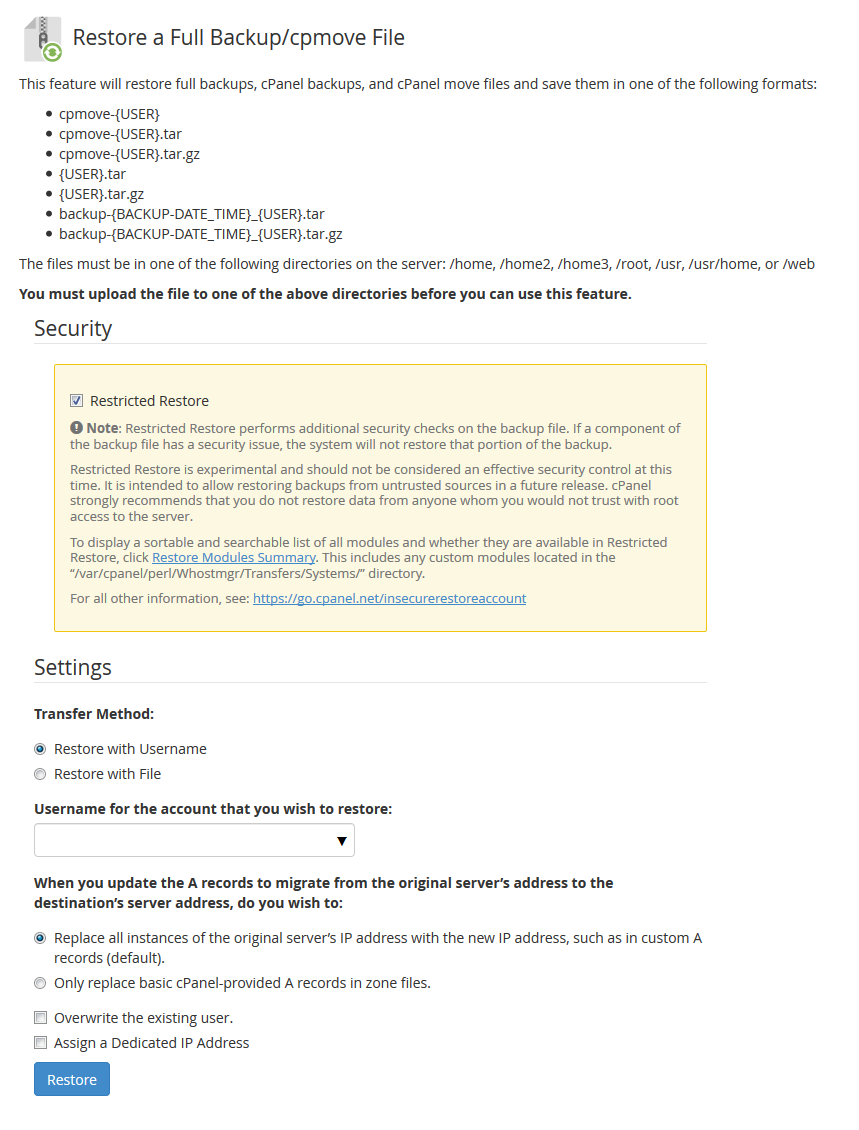
If you have direct access to the server you can effectively make the restoration by going to WHM>> Home »Backup» Restore a Full Backup / File cpmove;
To make the restoration it's necessary to upload to backup on the server in one of the following locations: / home, / home2, / home3, / root, / usr, / usr / home or / web.
In the next page, at Setting selec:
1. Transfer Method:
1. a. Restore with Username
In this case, the backup is uploaded on the server
1. b. Restore with File
In this case, the backup is located n your computer
When the restore is finished you will see the message from the image above, meaning that the restoration process was successful finished.
For any questions you have, please feel free to contact us.
1. b. Restore with File
In this case, the backup is located n your computer
2. When you update the A records to migrate from the original server’s address to the destination’s server address, do you wish to:
2. a. Replace all instances of the original server’s IP address with the new IP address, such as in custom A records (default).
Here the selected option above will remain.
When the restore is finished you will see the message from the image above, meaning that the restoration process was successful finished.
For any questions you have, please feel free to contact us.
