In the following tutorial, you can find the steps that can help you setup an email account in Thunderbird.
Before you begin, please make sure that you have a valid email account and you have collected all necessary data: username for the email account, email account password, server address POP/IMAP and SMTP. For example, if you have a domain name like ‘mydomain.com’ and an email account ‘[email protected]’, the username will be ‘[email protected]’ and the email server addresses will be ‘mail.mydomain.com’, for both POP/IMAP and SMTP.
1. Select Tools > Account Settings
In case the menu form above is not visible and you can't find tools, then right click on the upper bar and select 'Menu Bar'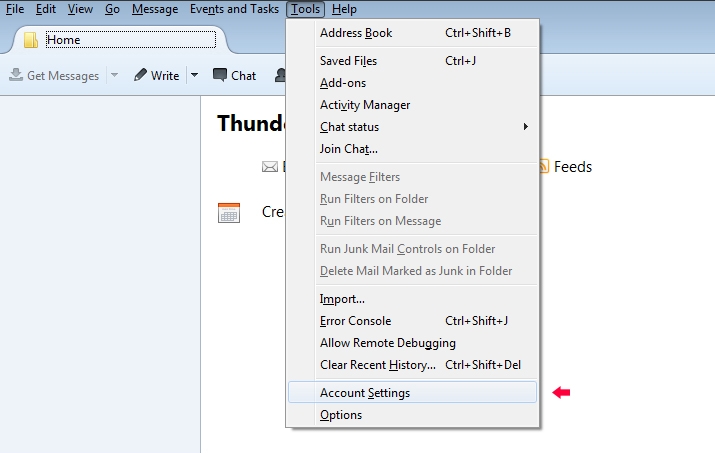
2. Click on'Account Actions' then 'Add Mail Account ...'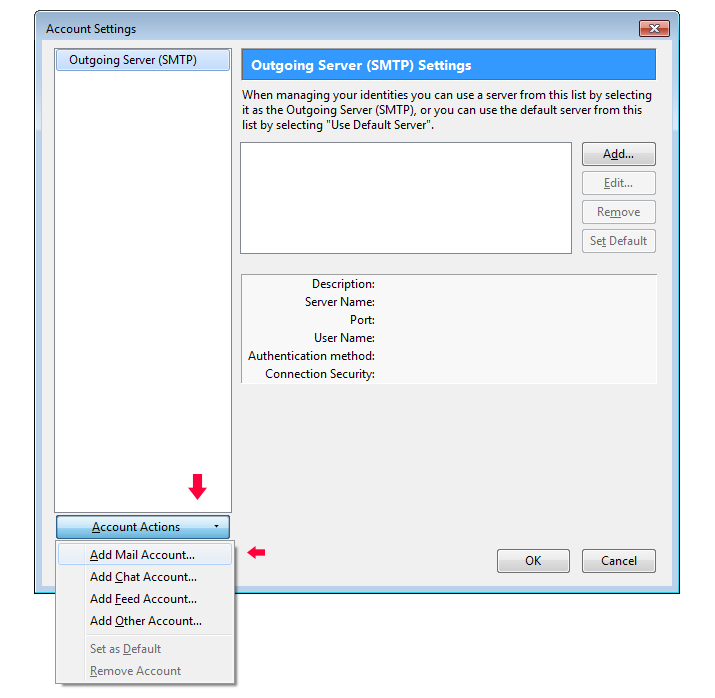
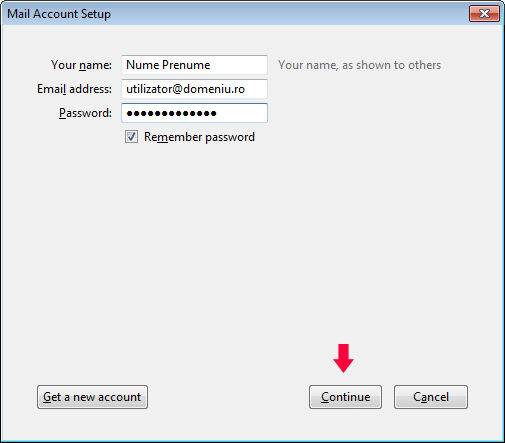
3. In the 'Your Name’ field, enter your name and in 'Email Address’ field your email, then complete the 'Password' field with your password and hit 'Next'.
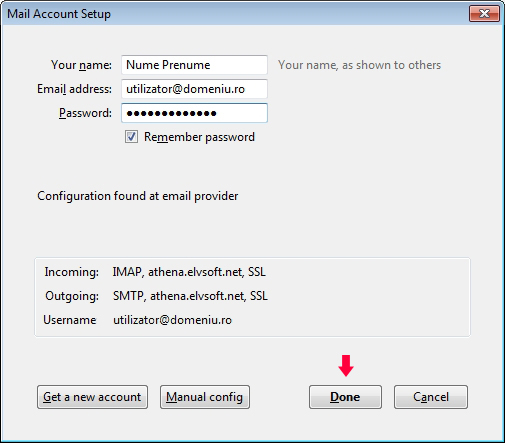
4. Thunderbird will find and configure automatically the settings(IMAP/SMTP) and you can just hit 'Done' to finish.
If you wish to configure your mail through POP3, select 'Manual config'
5. The image above will appear if you have chosen 'Manual config'.
Using POP3 the email will be deleted from the server and will be stored locally on your computer.
In ‚Incoming mail server’ and ‚Outgoing mail server’ enter the email server address (like mail.mydomain.com, where you have to replace mydomain.com with the name of your domain where the email address is created).
You can choose the SSL/TLS option or None. If you chose SSL/TLS make sure that the server has SSL connection available for email. Select 'Re-test' and then 'Done'.
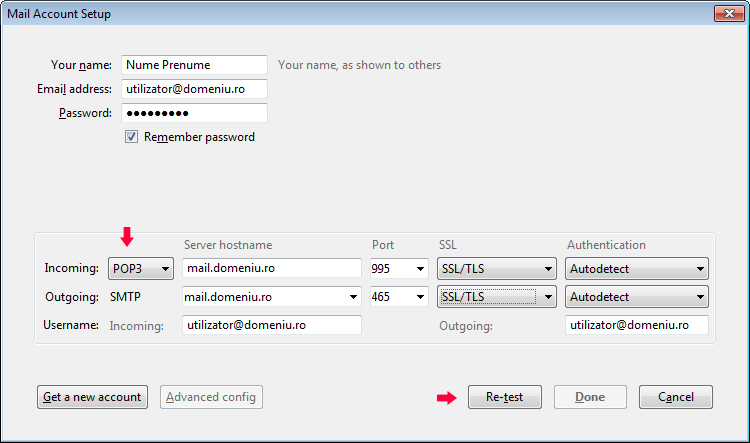
After completing this steps you should have a functional email account.
6. If the SMTP server is not properly configured you can follow the next steps:
Select Tools>Account Settings and Outgoing Server(SMTP). Select 'Add...' to add a new SMTP server.
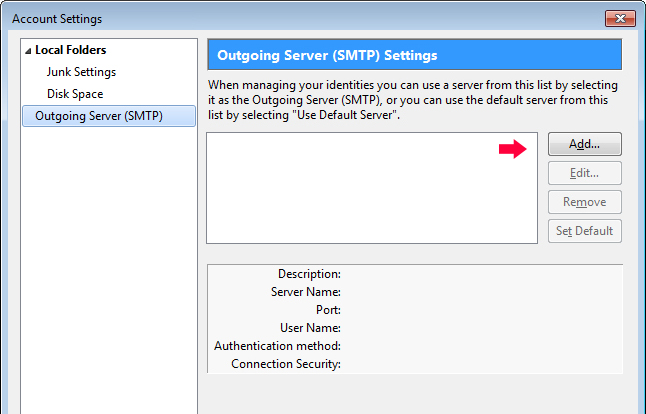
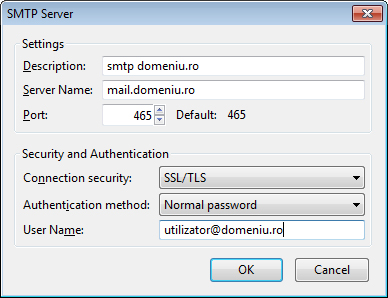
7. In the field, 'Description' add a server short description and in 'Server Name' enter the server address like mail.mydomain.com (where mydomain.com is the domain you own).
At 'Connection security' you can choose SSL/TLS or None. If you chose SSL/TLS make sure that the server has SSL connection available for email.
In the field 'User Name' add the email address for which the account is configured and hit 'OK'.
8. On the left select the new account configured and under 'Outgoing Server (SMTP)' chose the name of the server created earlier for sending messages. Select 'OK'
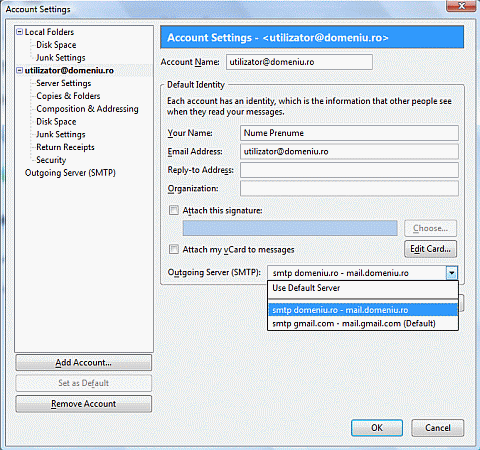
After completing this steps you should have a functional email account.
