In the following tutorial, you can find the steps that can help you setup an email account in Windows Mail.
Before you begin, please make sure that you have a valid email account and you have collected all necessary data: username for the email account, email account password, server address POP/IMAP and SMTP. For example, if you have a domain name like ‘mydomain.com’ and an email account ‘[email protected]’, the username will be ‘[email protected]’ and the email server addresses will be ‘mail.mydomain.com’, for both POP/IMAP and SMTP.
1. Select Tools>Accounts...
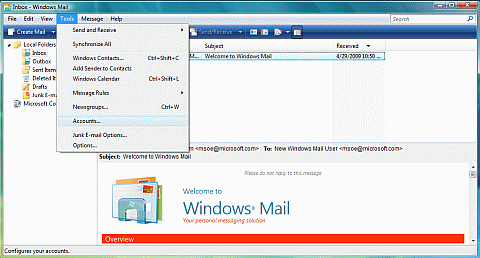
2. Select 'Add...' to add a new account.
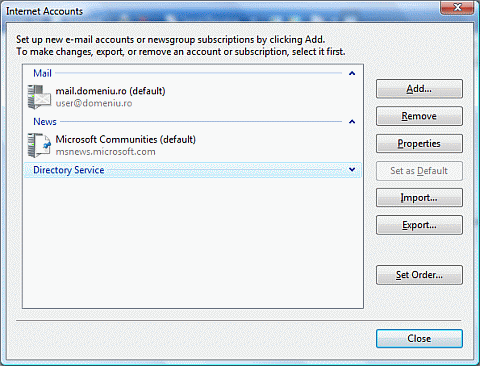
3. Select 'E-mail Account' to configure a new email account and hit 'Next'.
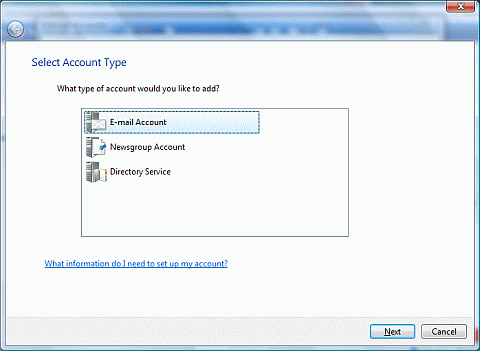
4. In the field 'Display Name' enter your name.
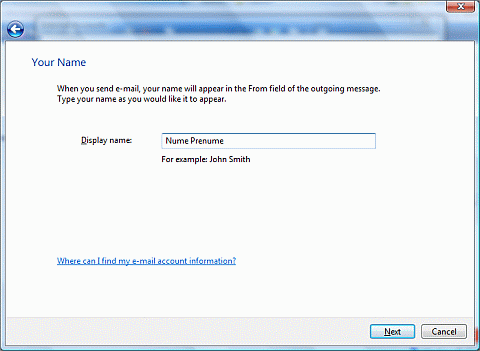
5. In the field, 'Email address' enter your email address.
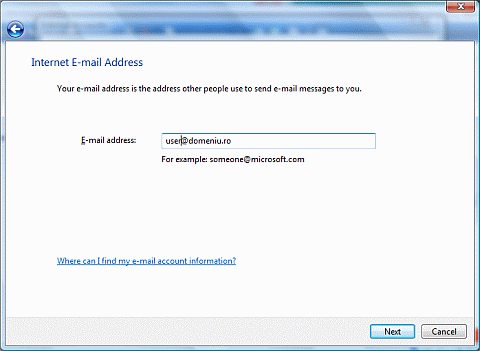
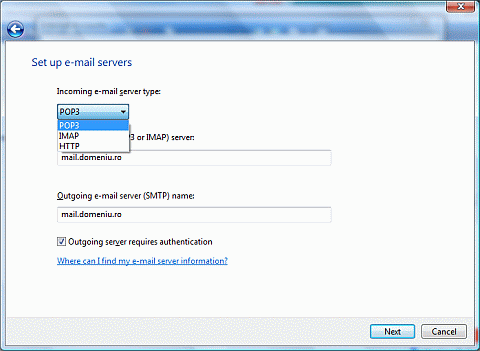
6. At 'Incoming e-mail server' select POP3, if you want to have your emails locally or IMAP if you want that emails to be kept on the server.
In ‚Incoming mail server’ and ‚Outgoing mail server’ enter the email server address (like mail.mydomain.com, where you have to replace mydomain.com with the name of your domain where the email address is created).
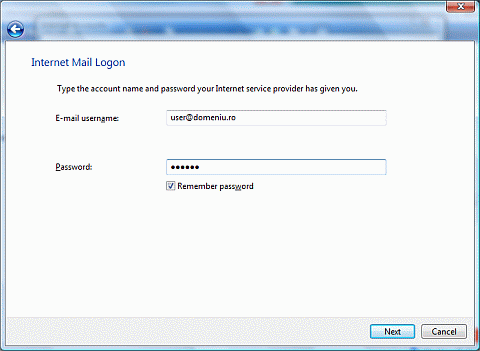
7. In the field 'E-mail username' add your email address and in the field 'Password' add the email password. Click 'Next ' and the 'Finish'.
After completing this steps you should have a functional email account.
